
Many of the routine I’ve published on Autodesk-Apps will not appeal to “run of the mill” CAD users. I don’t find that bothersome, though, because they already have numerous developers vying for their attention. The users out at the fringe – working with AutoCAD in a way that has others telling them that they are using the wrong program – are more likely to see the value in my routines. You are the guys that I relate to. Of course, you are also the most difficult to predict “what the hell” it is that you are actually doing with AutoCAD – or anything else for that matter.
Consequently, the end result of this tutorial may seem contrived. I tried to make the scenario somewhat general, for fringe dwellers anyway, but I doubt that the specifics would ever be generally useful.
The purpose of the tutorial is to demonstrate some techniques leveraging raster image manipulation tools to produce a base image for my STSC_HeightMap routine; with the ultimate goal of creating a 3D surface that would be extremely difficult to produce any other way.
The scenario:
Create a reasonably accurate model of ripple interference.
First step:
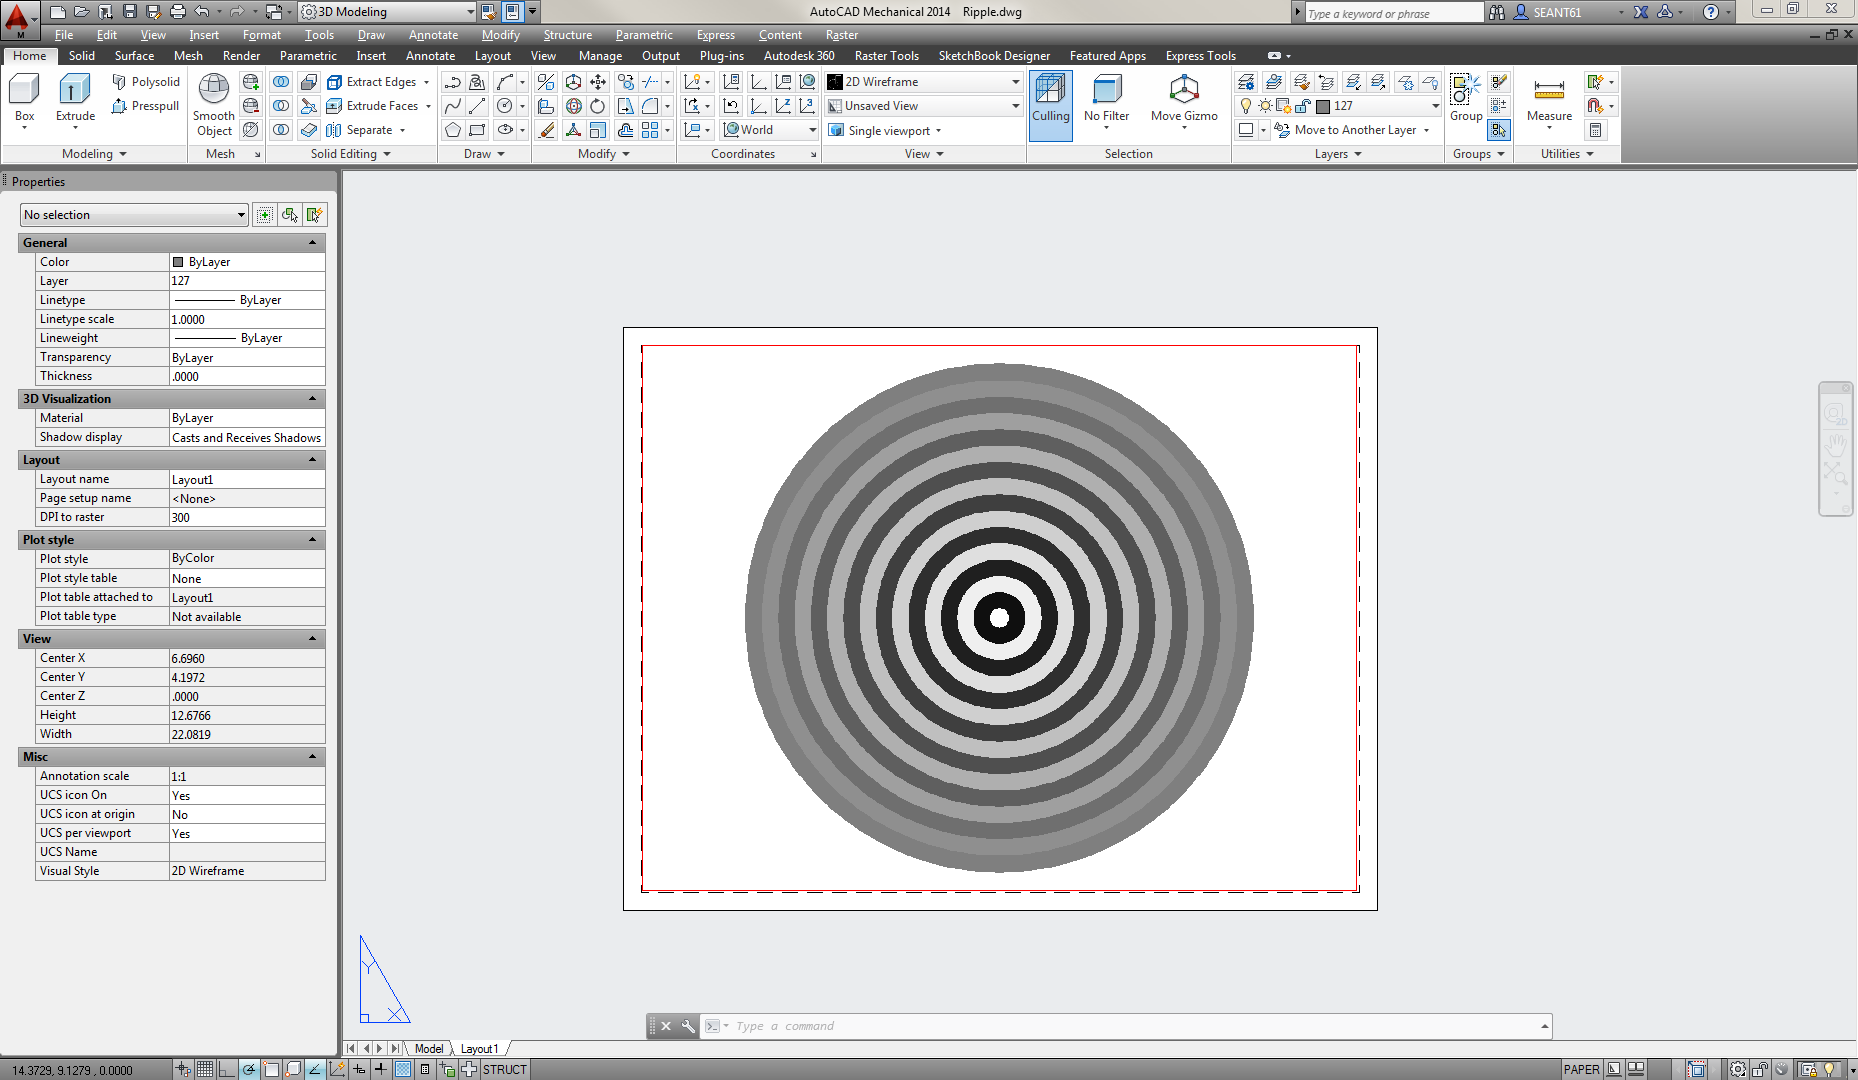
I’ll use AutoCAD to create a single radial ripple pattern. The colors used for successive ripples diminish proportionally with distance from the center:
Second step:
Using either a Publish to Web JPG/PNG or even just a PrintScreen key press I created an importable raster file ready for image manipulation. In my case I brought the image into Corel PhotoPaint. I suspect the other players in the image manipulation industry have similar functions.
Image Manipulation steps:
The first thing I did was to apply a Gaussian blur. This softens the edges to produce a more Natural/Sinusoidal transition from one color to the next.

A copy and Paste As Object operation gave me another exact copy aligned on top of the original.
Interference of wave patterns always produce constructive and destructive intersections. To best replicate this property I used the “Multiply” merge mode. This tell PhotoPaint to combine the images such that two aligned dark pixels get darker, two light pixels get lighter. See this short animation captured while I moved one image relative to the other:
Eventually, I placed three copies into an arrangement that had some interesting interference patterns.

In the final step I returned to AutoCAD and applied the displacement to a regular surface:
https://chronicle.autodesk.com/Main/Details/da1ab04e-55fa-4aa5-aebd-8ae48928f219
I’m not sure what the surface is, or why I would have needed it, but the process for creating it was not too bad.

Leave a comment