This tutorial will demonstrate the use of the STSC_uvVectorMap command. As I’ve mentioned in other tutorials, it is difficult to predict how some of my routines will be used. For this demo I tried to create a fairly generic scenario, though I could easily see how the specifics would never be directly applicable. That’s okay, as long as the demonstration offers guidance to whatever task the user does intend.
The objective of this scenario requires me to depict braided hose. One way to do this would be via photorealistic rendering. The scenario must contend with certain scalability and printing issues (pen plotter compatibility) that lends itself towards a pure vector graphics solution. I’ve got just the tool for the job.
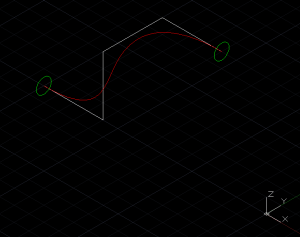
I first create the construction geometry necessary for the curved cylindrical tube.
The LOFT command uses the two circles as profiles, and the spline as the path. The resultant surface serves as the base for the morphed texture pattern.
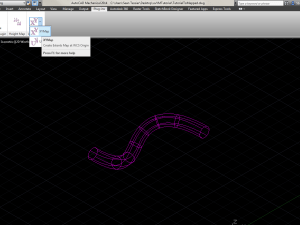
The STSC_uvVectorMap routine is a two stage command. The UV parameter space of the cylinder needs to be transformed to 2D. The Ribbon/Plug-Ins/Vector Map/XYMap button calls the appropriate command (CPMAP).*
The 2D mapping will always be near the WCS origin. If the drawing contains other, non-related geometry in that same area it may be advisable to freeze/hide that until the vector mapping operation is complete.
The “Canvas” returned by the CPMAP procedure will be a block reference. The rectangle in the block represents the full UV Parameter Interval associated with the surface. A possibility exists that this interval extends beyond that of the picked surface due, perhaps, to a previous Trim/Boolean operation. Trimmed edges will be included in the Canvas, so coordinating geometry placement should be possible. The Canvas also includes data about the original surface. This data allows coordination for subsequent procedure calls.
Any of AutoCAD’s curve based entities can be mapped back to the 3D surface. In this demo, I pre-HATCHed the appropriate sized rectangle with a pattern that resembles a braided sheath, then EXPLODEd that to standard lines. I moved the group of lines back into position then initiated the CVPGLOBAL procedure by clicking the Ribbon/Plug-Ins/Vector Map/UVMap. *
The routines asks the user (me, in this case) to select the geometry to be mapped, then to select the Canvas. Upon successful operation, the Canvas should be erased from the drawing, and facsimiles of the 2D geometry mapped back to the 3D surface.
A PDF of the final product.
The Chronicle video demonstrates much of the procedures described here.
https://chronicle.autodesk.com/Main/Details/a3afe1be-968d-421c-81f6-167c375abfca
* I apologize for this confusion with naming. If needed, I might modify the naming convention on the procedures next update.


Leave a comment